Most podcast equipment for beginners advice oversells you. The truth is you need a good microphone, a pair of closed-back headphones, somewhere quiet to record, and software — and almost nothing else to sound great. This guide covers what genuinely matters, what is optional, and what you can safely skip until your show grows. If you are starting from zero, our complete guide to starting a podcast walks through the bigger picture too.
Violet Recording is reader-supported — we may earn a commission from links on this page, at no extra cost to you.
The short list: what you actually need
- A microphone — the single biggest factor in how you sound.
- Closed-back headphones — to monitor while you record and edit.
- A quiet room — free, and more important than expensive gear.
- Recording/editing software — free options are excellent.
- A pop filter and a stand or boom arm — cheap accessories with a big payoff.
That is it for a solo or co-hosted show. Everything below explains how to choose each piece.
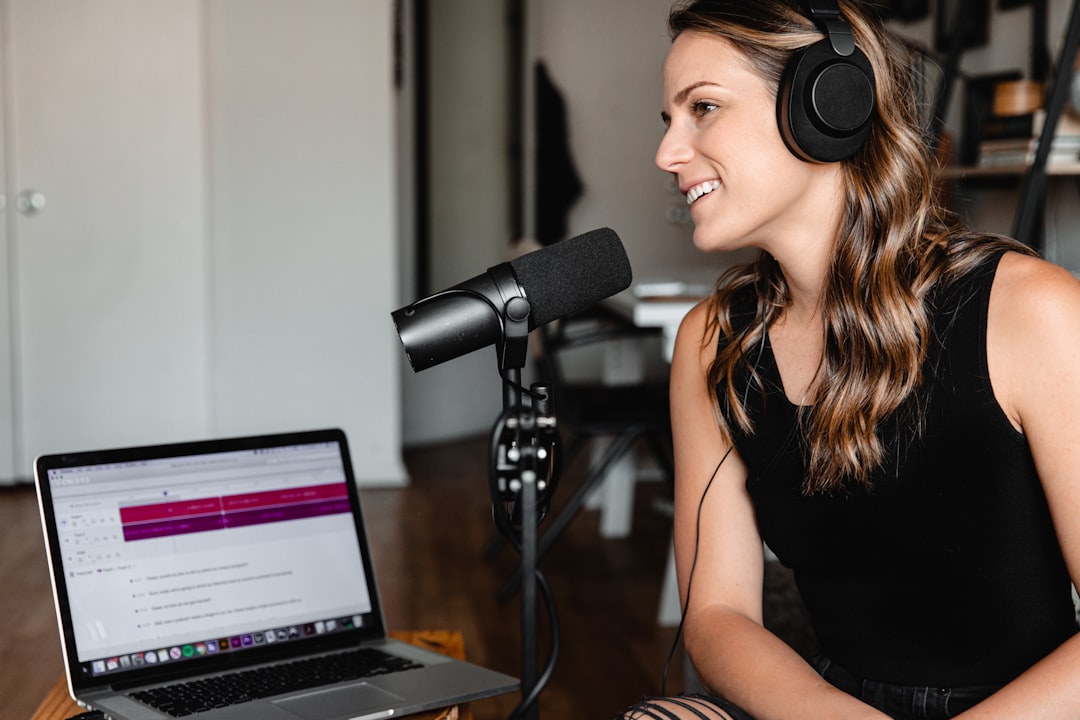
The microphone: USB or XLR?
This is the decision that matters most. A USB microphone plugs straight into your computer, needs no extra gear, and is the fastest way to start. An XLR microphone needs an audio interface but gives you room to grow and add more mics later. If you are unsure which path suits you, read our breakdown of a USB mic versus an audio interface.
For podcasting specifically, a dynamic microphone is usually the smarter choice over a condenser, because it picks up less of the room and background noise around you. Our condenser vs dynamic microphones guide explains why, and when you should pick each. When you are ready to choose a specific model, see our best podcast microphones roundup. A great starter pick is the Samson Q2U or the Audio-Technica ATR2100x — both are USB dynamic mics that also offer an XLR output, so you can begin plugged straight into your laptop and move to an interface later without buying a new mic.
Headphones for monitoring
Use closed-back headphones, never speakers, while recording. Closed-back models keep sound from leaking back into the mic and let you hear problems live. They also double as your editing headphones. Our guide on open-back vs closed-back headphones explains the difference, and our roundup of the best headphones for voice recording covers good picks. The Sony MDR-7506 is a long-standing, affordable closed-back studio standard; if you want a slightly fuller sound, the Audio-Technica ATH-M50x is another reliable closed-back choice.
An audio interface (only if you go XLR)
If you choose an XLR mic, you need an interface to connect it to your computer and supply power. A simple one- or two-input model is plenty to start. Skip this entirely if you go USB. When the time comes, our guide on how to set up an audio interface walks you through it. The Focusrite Scarlett Solo is a popular single-mic starter interface, while the PreSonus AudioBox is another straightforward option if you want a second input for a co-host.
Accessories that punch above their weight
- Pop filter or foam windscreen — tames the bursts of air on “p” and “b” sounds.
- Boom arm or sturdy stand — keeps the mic at a consistent distance and reduces desk thumps.
- Shock mount — isolates the mic from knocks; see what a shock mount is.
Your room matters more than your gear
An expensive mic in an echoey room sounds worse than a cheap one in a treated space. Record somewhere small and soft — soft furnishings, carpet, curtains, and clothes all absorb reflections. A little acoustic treatment for home studios makes a bigger difference than upgrading your mic.
Software: start free
You do not need to buy anything to record and edit. Audacity is free and capable; Reaper is affordable and powerful. Our best free DAWs for beginners guide covers the options, and our guide to editing a podcast shows you how to use them.
How to choose your first setup, step by step
If the options above still feel like a lot, work through them in this order and the decision largely makes itself.
- Start with your budget and ambition. A solo show that lives on your desk has very different needs from a roundtable with three guests. Buy for the show you have now, not the one you imagine in two years.
- Pick the microphone path first. If you want the simplest possible start, go USB. If you already know you will add co-hosts or want to grow into a fuller setup, a USB/XLR hybrid mic lets you delay the interface purchase without wasting money.
- Sort your room before you spend more. Choose the smallest, softest space you have and test a recording there. This single step often improves your sound more than any upgrade.
- Add accessories last. A pop filter and a stable stand or boom arm are the two that earn their keep immediately. Everything else can wait.
Spend the bulk of your attention on the mic and the room, and treat the rest as small finishing touches rather than headline purchases.
Common beginner mistakes to avoid
Most rough-sounding early episodes come down to a handful of avoidable habits rather than cheap gear.
- Sitting too far from the mic. Most dynamic podcast mics want you close — a hand-span away or less. Backing off makes you sound thin and lets the room creep in; a few simple tweaks to sound better on a podcast microphone go a long way here.
- Recording into an untreated, hard-surfaced room. Bare walls, tile, and glass create echo no amount of editing fully removes. Soften the space first.
- Monitoring on speakers. Speakers bleed back into the mic and hide problems. Closed-back headphones let you catch issues as they happen.
- Setting levels too hot. Recording at a level that clips is unrecoverable. Aim for healthy peaks with headroom to spare, and ride a little quieter rather than risk distortion.
- Buying gear to fix a technique problem. A new mic will not fix poor positioning, a noisy room, or inconsistent delivery. Solve the habit first.
What to skip for now
You can ignore mixers, expensive outboard gear, high-end studio monitors, and elaborate mic locker upgrades when starting out. Add gear only when a real limitation tells you to, not before. A clean recording in a quiet room with one good mic will out-perform a pile of equipment used poorly.
Frequently asked questions
Can I start a podcast with just a USB mic and laptop?
Absolutely. A good USB dynamic microphone, your laptop, free editing software, and a quiet room are enough to produce a professional-sounding show. Many successful podcasts run on exactly that setup for years.
Do I need an audio interface for podcasting?
Only if you choose an XLR microphone. USB mics plug directly into your computer and need no interface. Go XLR plus interface when you want to add multiple mics or grow into a more flexible setup.
Is a dynamic or condenser mic better for beginners?
For most home podcasters, a dynamic microphone is the safer choice because it rejects more background noise and room echo. A condenser captures more detail but also more of an untreated room, which can work against you early on.
How much should I spend on my first podcast setup?
You can put together a genuinely good solo setup for the price of one decent microphone plus a few cheap accessories, since your software and your quiet room cost nothing. Spend on the mic, keep the rest minimal, and only upgrade once a specific limitation pushes you to.


