
A new audio interface is the heart of a home studio, but the first setup trips a lot of people up. Follow these steps in order and you’ll go from box to first recording without the usual latency, no-sound and crackle problems.
1. Install the drivers first
Before plugging anything in, download the latest drivers from the manufacturer’s site for your exact model. On Windows this gives you a proper ASIO driver, which is essential for low-latency recording. On macOS most interfaces are class-compliant and need no driver, but it’s still worth installing the manufacturer’s control panel.
2. Connect and set your sample rate
Plug the interface into a USB port directly on your computer (avoid hubs at first). Set it as your system’s default playback and recording device, then choose a sample rate of 44.1 or 48 kHz – and make sure your DAW uses the same rate to avoid clicks and sync issues. If you’re unsure which to pick, our guide to sample rate and bit depth explains what to use and why.
3. Set input gain properly
Connect your mic or instrument, enable phantom power (48V) only if you’re using a condenser mic, and raise the gain until your loudest moments peak around -12 to -6 dBFS. Leaving that headroom keeps your recordings clean and gives you room to mix later – see our explainer on gain staging.
4. Configure your DAW
- Open your DAW’s audio settings and select the interface (the ASIO driver on Windows).
- Set the buffer size: small (64-128 samples) while recording for low latency, larger (256-512) while mixing for stability.
- Create an audio track, set its input to the correct interface channel, and arm it to monitor.
5. Fix the common problems
- No sound? Check the interface is the default device and your monitors/headphones are in the right output – our walkthrough on fixing no sound from your interface covers the rest.
- Latency or echo? Lower the buffer size, or use the interface’s direct monitoring so you hear yourself without delay.
- Crackles or dropouts? Raise the buffer size, close other apps, and use a rear USB port.
Once it’s recording cleanly, you’re ready to choose the right mic for the job – start with condenser vs dynamic microphones.
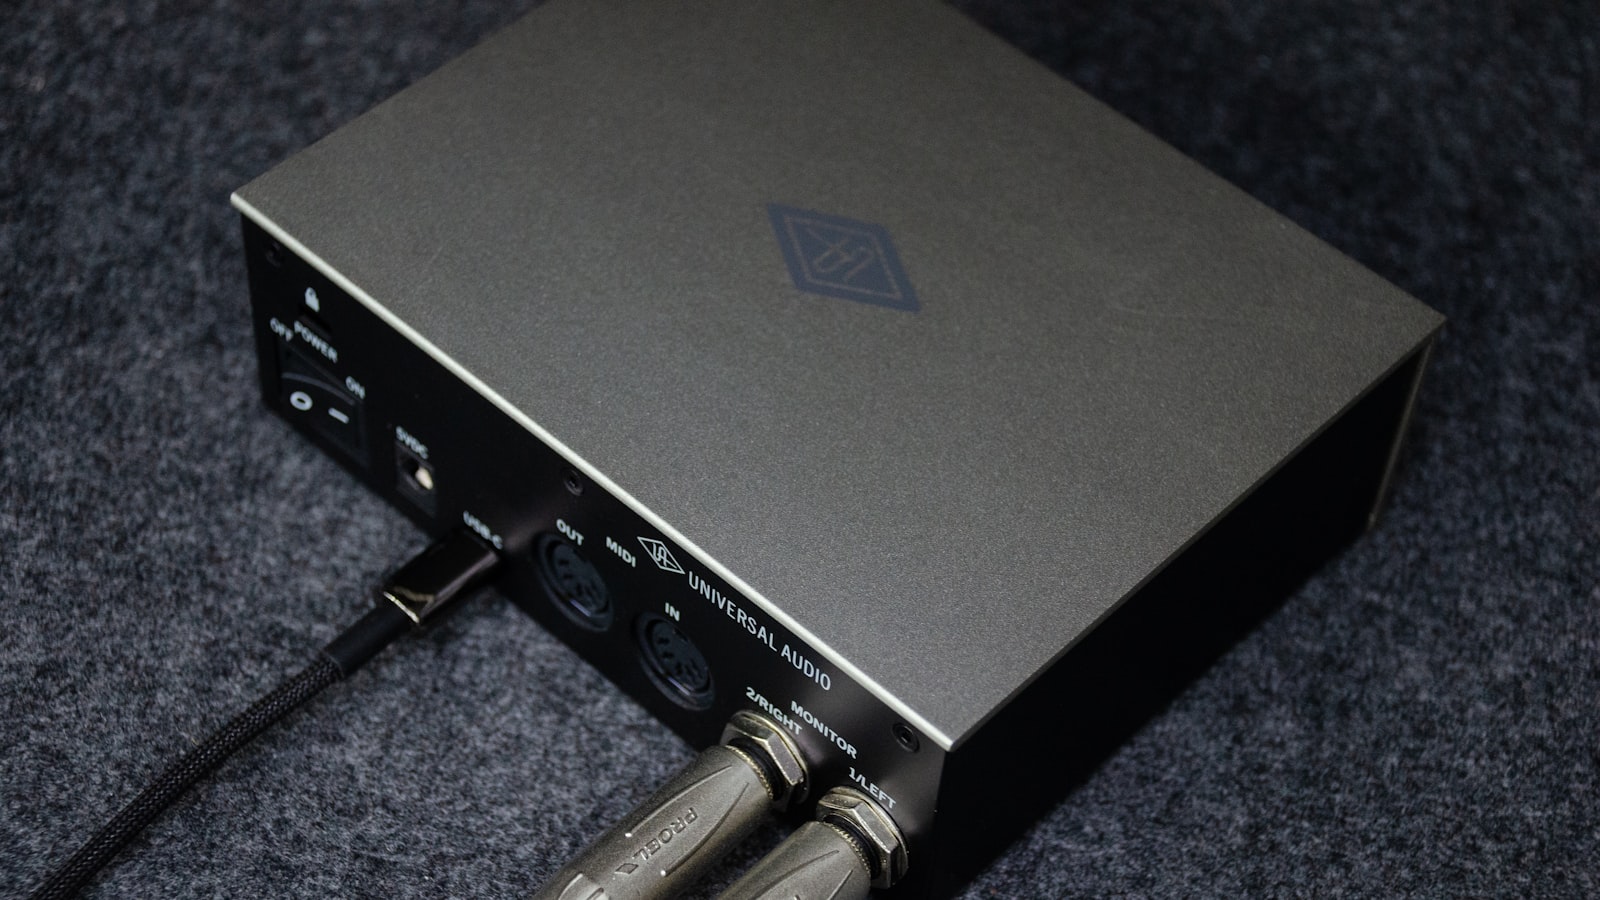
Understanding the connections on the back
A lot of the confusion in the first hour comes from not knowing which socket does what. Spending two minutes learning the back panel saves a lot of trial and error. Most desktop interfaces share the same handful of connectors.
- XLR / combo inputs. The combo jack takes both a balanced XLR (for microphones) and a 1/4-inch jack. This is where your mic or DI’d instrument goes.
- Instrument (Hi-Z) input. A switch or dedicated socket marked “Inst” sets the input impedance for plugging a guitar or bass in directly. Engage it for passive pickups, leave it off for line-level sources.
- Line outputs / monitor outs. Balanced TRS or XLR outputs that feed your studio monitors. Use balanced cables here to keep hum and noise out of the signal.
- Headphone output. Its own volume knob, independent of the monitor level, so you can track quietly without disturbing the room.
- USB / power. Most modern interfaces are bus-powered over a single USB cable; larger units need a separate power supply.
If your interface has more than one input, take a moment to note which physical socket maps to which channel number in your DAW. Mislabelled inputs are the most common reason a track records silence even though the gain is up.
How to choose the right buffer size
Buffer size is the single setting people change most, so it helps to understand the trade-off. A smaller buffer asks the computer to process audio in tiny chunks, which means you hear yourself faster (lower latency) but the CPU has less breathing room, so you risk clicks and dropouts. A larger buffer is more stable but adds delay that makes live monitoring feel sluggish. If the term is new to you, here’s what buffer size means in plain English.
The practical approach is to use two settings. While tracking, set the buffer as low as your machine will tolerate without crackling – often 64 or 128 samples – so monitoring feels immediate. When you move on to mixing and start stacking plug-ins, raise it to 256 or 512 (or higher) so the project plays back reliably. If you have a capable interface, lean on its hardware direct monitoring instead of pushing the buffer dangerously low, since that lets you hear your input with effectively zero latency regardless of the DAW setting.
Common setup mistakes to avoid
Most first-time problems come down to a short list of avoidable slips. Run through these before you assume something is broken.
- Running two audio devices at once. Leaving your laptop’s built-in audio active alongside the interface causes sync drift and missing audio. Select the interface as the one and only device in both your operating system and your DAW.
- Leaving phantom power on for everything. 48V is only needed by condenser mics. Sending it to a ribbon mic can damage it, and it does nothing useful for dynamic mics or line sources, so switch it off when it isn’t required.
- Chasing volume with the output knob. If a recording is too quiet, fix it at the input gain stage, not by cranking monitors afterwards. Aim for healthy peaks around -12 to -6 dBFS at the source.
- Using a cheap or unpowered USB hub. Bus-powered interfaces want a direct port. A weak hub starves the unit and produces dropouts that look like driver faults – if you do need one, see the best USB hubs for audio interfaces.
- Mismatched sample rates. If the interface, operating system and DAW disagree on sample rate, you get clicks or pitched-up playback. Set all three the same.
Frequently asked questions
Do I need an audio interface if my computer has a microphone input?
For anything beyond casual voice notes, yes. A built-in input uses a basic converter with a noisy preamp, no phantom power and no low-latency driver. A dedicated interface gives you cleaner conversion, proper gain for studio mics and the stable, low-latency monitoring you need to record and overdub in time.
Why is there a delay when I hear myself while recording?
That delay is latency – the time it takes audio to travel into the computer, through your DAW and back out. Lowering the buffer size reduces it, but the cleanest fix is to switch on your interface’s direct (hardware) monitoring, which routes your input straight to the outputs so you hear yourself instantly. For more ways to tighten it up, see how to reduce latency when recording.
Can I plug the interface into a USB hub?
It can work, but during setup connect directly to a port on the computer – ideally a rear port on a desktop – to rule out power and bandwidth problems. If you must use a hub later, choose a powered one and avoid sharing it with other demanding devices.
Shop related gear
A reliable beginner interface to set up:
Clean preamps and low-latency USB-C — the sweet spot for most home studios.


