
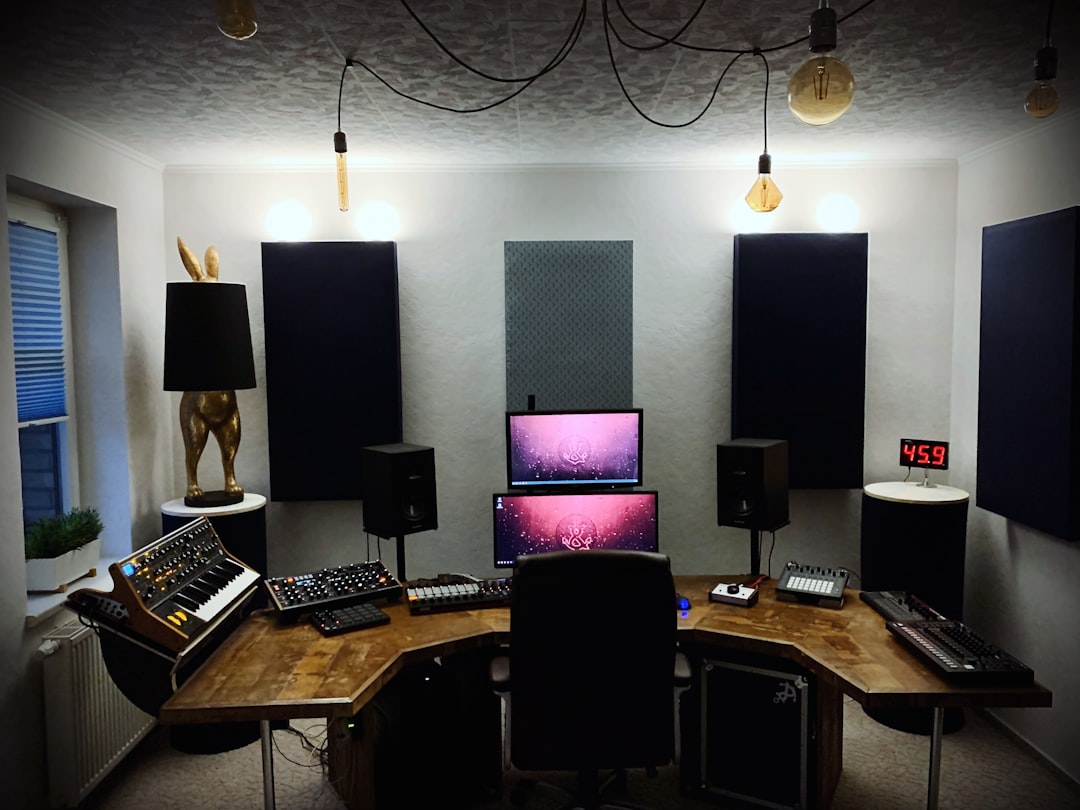
Early reflections are the first sound bounces that reach your ears shortly after the direct sound from your speakers — typically off the side walls, ceiling, floor and the desk in front of you. They arrive within the first few milliseconds and combine with the direct sound, which blurs stereo imaging and colours the frequency response. Controlling early reflections is one of the most worthwhile things you can do for an accurate monitoring environment.
Quick answer: find the points on your walls and ceiling where sound bounces straight from speaker to ear, and treat those spots with absorption. That tightens your stereo image and reduces colouration immediately.
What Early Reflections Are
When your speaker produces sound, the direct path travels straight to your ears. But sound also radiates sideways and bounces off nearby surfaces. The first of these bounces — the early reflections — arrive only a few milliseconds after the direct sound. Because they’re so close in time and still fairly loud, your brain doesn’t hear them as separate echoes; instead they merge with the direct sound and alter what you perceive. This is a key part of how sound behaves in a room.
The reason early reflections fool you is timing. Our hearing evolved to fuse sounds that arrive within roughly the first 20–30 milliseconds of each other into a single perceived event — an effect known as the precedence effect. A reflection bouncing off a wall a metre or so away easily falls inside that window, so it never registers as a separate echo. Instead it changes the apparent tone, width and even the apparent position of whatever you’re listening to. That is precisely why early reflections are so deceptive: you don’t hear a problem, you hear a slightly wrong version of the truth.
Why Early Reflections Are a Problem
Early reflections cause two main issues:
- Smeared stereo imaging. Strong side-wall reflections confuse your brain’s sense of direction, so instruments don’t sit precisely in the stereo field. A treated room gives a sharper, more stable image.
- Frequency colouration. When the reflection combines with the direct sound, certain frequencies reinforce and others cancel — the same interference that produces comb filtering. This makes your monitoring response uneven and unreliable.
The result is that you make mixing decisions based on a coloured image, and your mixes don’t translate well to other systems. Good imaging is also why speaker placement matters so much — see how to position studio monitors.
It’s worth understanding why this hurts your mixes in practice. If a side-wall reflection is exaggerating the upper mids, you’ll hear instruments as brighter than they really are and instinctively pull EQ out of them. On a system without that reflection — a friend’s car, a pair of earbuds, a club PA — those instruments now sound dull, because you compensated for a room problem rather than a mix problem. Treating early reflections removes that false information so the decisions you make at the desk hold up everywhere else.
How to Find Your First Reflection Points
The classic method is the mirror trick:
- Sit in your normal listening position.
- Have a friend slide a small mirror along each side wall (and the ceiling, if you can reach).
- Wherever you can see a speaker reflected in the mirror from your seat, that’s a first reflection point.
- Mark those spots — they’re where absorption does the most good.
You can also reason it out geometrically: the reflection point on each side wall sits roughly midway between you and the speaker on that side. For a step-by-step walkthrough of the mirror method and the geometry behind it, see our guide on how to find your first reflection points.
Find the points for both speakers, not just the nearest wall. The left speaker reflects off the right side wall as well as the left, and vice versa, so a properly symmetrical setup usually has two marked spots on each side wall plus one on the ceiling. Symmetry matters here: if the left and right reflection paths aren’t treated the same way, the two channels won’t be balanced, and your centre image will pull to one side. Treat both walls identically even if only one of them seems obviously reflective.
How to Treat Early Reflections
Place broadband absorbers at the marked first reflection points. Use proper porous absorbers — panels of mineral wool or rigid fibreglass (Rockwool, Owens Corning 703) wrapped in fabric, not thin foam, which leaves the lower mids untreated. Cover:
- Side walls at the first reflection points — the biggest improvement to imaging.
- Ceiling above and slightly in front of the listening position, often with an overhead acoustic cloud panel.
- The desk and any reflective surface between you and the speakers, where possible.
For a full plan, see acoustic treatment for home studios, and if you’re building your own panels, our DIY acoustic treatment guide. Remember this is treatment — controlling sound inside the room — not soundproofing, which is about isolation.
Two practical details make a big difference. First, panel thickness sets how low the absorber works: a thin panel sitting flat on the wall mainly tames the highs and upper mids, while a thicker panel — or the same panel mounted with an air gap behind it — reaches further down into the mids where reflections do real damage. Aim for some depth rather than relying on the thinnest option. Second, give each panel a little margin around the marked point. Your head isn’t a single fixed spot, and a panel slightly larger than the exact reflection point keeps you covered as you shift in your seat.
Common Mistakes
A few errors crop up again and again when people first tackle early reflections:
- Reaching for thin foam. Decorative foam tiles look the part but absorb only the top end, leaving the problematic lower mids untouched. Porous panels with real depth are what you want.
- Treating one wall and not the other. Asymmetry shifts your stereo image; treat left and right the same.
- Covering every surface. Over-treating kills the high end and leaves a lifeless, fatiguing room. Target the reflection points, then stop and listen.
- Ignoring the ceiling and desk. The vertical bounce off the ceiling and the bounce off a glossy desktop are reflection points too, and they’re easy to forget.
Should You Absorb or Diffuse?
At the first reflection points in a small room, absorption is usually the safer choice because it removes the problematic reflection cleanly. Diffusion is better suited to the rear wall, where it preserves a sense of space without sending a strong reflection back to your ears. If you’re weighing the two approaches, our breakdown of absorption vs diffusion covers where each one belongs. The goal isn’t a dead room — it’s controlling the reflections that mislead you while keeping the space natural.
Frequently Asked Questions
How are early reflections different from reverberation?
Early reflections are the first one or two bounces that arrive within a few milliseconds of the direct sound. Reverberation is the dense tail of many later reflections that follows. Early reflections affect imaging and colouration; reverberation affects the overall decay and sense of space.
Do I need to treat the floor too?
The floor is a reflection point, but it’s awkward to treat and you generally won’t put a panel where you walk. A thick rug between you and the speakers helps reduce the floor bounce without getting in the way.
Will treating early reflections make my room sound dead?
Not if you only treat the first reflection points rather than covering every surface. Targeted absorption tightens the image while leaving enough liveliness in the room. Over-treating everything is what creates an unnatural, dead sound.
How much difference will treating early reflections actually make?
For most untreated rooms it’s one of the most noticeable upgrades you can make — usually more obvious than swapping monitors. You’ll typically hear a tighter centre image, more defined panning and a flatter, more honest tone the moment the side-wall panels go up.



