
Vocals are the focal point of most songs, and you can absolutely record them to a professional standard at home. It comes down to a quiet space, sensible levels, good mic technique and a little patience. Here’s the full process.
1. Prepare your space
Pick the quietest room and reduce reflections – even a closet of clothes or some absorption behind the mic helps. Turn off fans and noisy gear, and if outside noise is still leaking in, work through our tips on reducing background noise before you hit record.
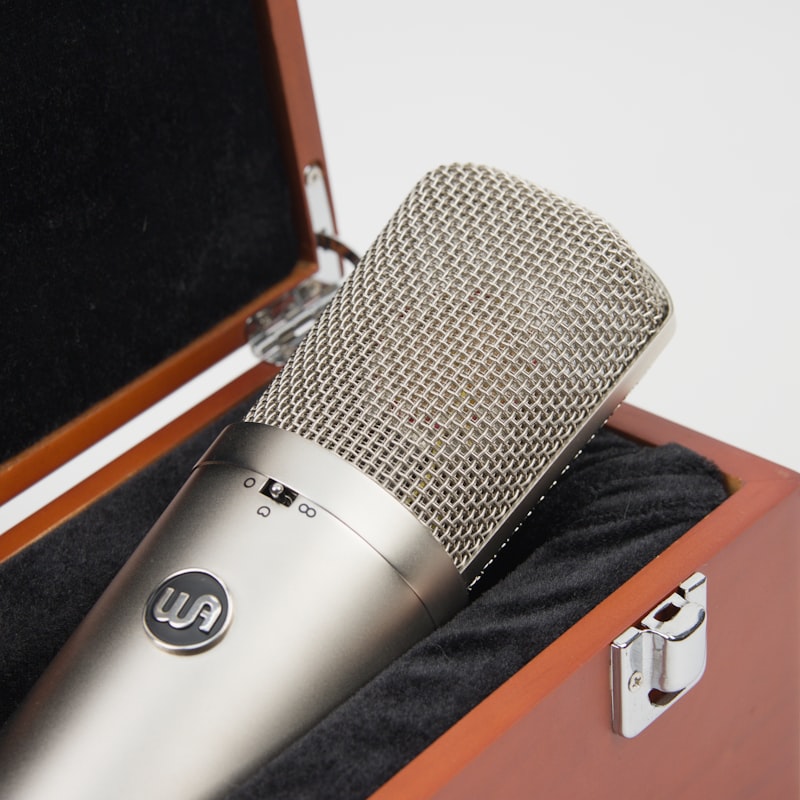
2. Choose and connect your mic
A condenser captures detail in a treated room; a dynamic is more forgiving in a live one. Connect it to your audio interface and enable phantom power if it’s a condenser.
3. Set levels with headroom
Aim for peaks around -12 to -6 dBFS so the loudest belts never clip – see gain staging. Resist recording too hot.
4. Position the mic
Start 15-20 cm away with a pop filter, singer slightly off-axis to tame plosives and sibilance. Our vocal mic placement guide covers the details.
5. Record multiple takes and comp
- Record several full passes rather than chasing one perfect take.
- Punch in to fix small problem spots.
- Comp the best moments from each take into one strong vocal.
With a clean vocal recorded, move on to mixing your song. To make the lead sound bigger, you can also double-track the vocal or build out harmonies once the main take is solid.
Getting the most out of your room
The single biggest difference between a home vocal and a studio one is usually the room, not the microphone. Untreated rooms add a boxy, hollow quality that is very hard to remove later, so it pays to deal with it at the source. Sing facing into soft furnishings rather than a bare wall, and keep at least a metre between yourself and any large flat surface where sound can bounce straight back into the mic.
If you have no treatment at all, a thick duvet hung behind and to the sides of you works surprisingly well as a temporary booth. The aim is to absorb the early reflections that arrive at the capsule a fraction of a second after your direct voice. A dynamic mic, with its tighter pickup pattern and lower sensitivity, will hear far less of a problem room than a wide-open condenser, which is why it is often the smarter choice when the space simply cannot be improved.
Mic technique that makes the difference
Once the mic is set, your own technique carries the rest. Keep a consistent distance from the capsule; drifting closer and further changes both the level and the tone, because most directional mics get bassier the nearer you sing – the proximity effect. If you want a warm, intimate sound, lean in slightly and control your dynamics. For powerful, belted lines, back off a few centimetres so the loudest notes do not overwhelm the mic.
Singing very slightly off-axis – aiming past the mic rather than straight into it – softens harsh plosives and sibilance without dulling the recording. Stay hydrated, warm up properly, and keep a glass of room-temperature water nearby. Small physical details like these show up clearly on a sensitive vocal track. For more ways to get cleaner, more usable passes, our vocal recording tips go further on technique.
Common mistakes to avoid
- Recording too hot. Chasing loud levels on the way in only invites clipping on the loudest words. Leave headroom; you can raise the level later.
- Ignoring the room. A great mic in a reflective, noisy room still sounds like a bedroom. Treat the space before upgrading gear.
- No pop filter. Plosives produce blasts of air that distort the capsule. A pop filter or even a foam screen prevents thumps on every “p” and “b”.
- Monitoring through speakers. Always track vocals on headphones so the backing does not bleed into the mic. Closed-back headphones are ideal.
- Over-processing while tracking. Record as clean as possible and save heavy effects for the mix, where they can be adjusted non-destructively.
Prepare the performance, not just the gear
A confident, well-rehearsed performance will always beat a tentative one captured on better equipment. Know the song well enough that you are not reading lyrics for the first time, and decide in advance where you want to push and where to pull back. A light reverb in your headphone mix can help you pitch and phrase more naturally while tracking, as long as you do not commit it to the recording itself.
Comfortable monitoring matters too. If the backing is too loud in your headphones you will tend to sing sharp; too quiet and you may drift flat. Set a balanced level, lower one ear cup if it helps you hear your own voice, and take short breaks so fatigue does not creep into the later takes. Capturing two or three strong, in-tune passes gives you far more to work with at the comping stage than a dozen tired ones. If you are new to tracking your own voice, our walkthrough on recording yourself singing covers the workflow end to end.
Frequently asked questions
Do I need a condenser mic to record vocals at home?
No. A condenser captures more detail in a well-treated room, but a good dynamic mic is more forgiving in an untreated or noisy space and can give excellent results. Choose the mic that suits your room, not just the one with the bigger reputation.
How far should I stand from the microphone?
Around 15–20 cm is a sensible starting point for most voices, with a pop filter between you and the capsule. Move closer for a warmer, more intimate tone and further back for loud, powerful passages so the peaks stay controlled.
Why do my home vocals sound thin or boxy?
That hollow, boxy character almost always comes from untreated room reflections rather than the microphone. Add some absorption around the recording position, sing into soft furnishings rather than a bare wall, and consider a dynamic mic if the room cannot be improved.
Shop related gear
Set yourself up to record clean vocals at home:
A versatile cardioid mic tuned for clear, present vocals at home.
Tames plosives and protects your capsule — an essential vocal-recording accessory.


