
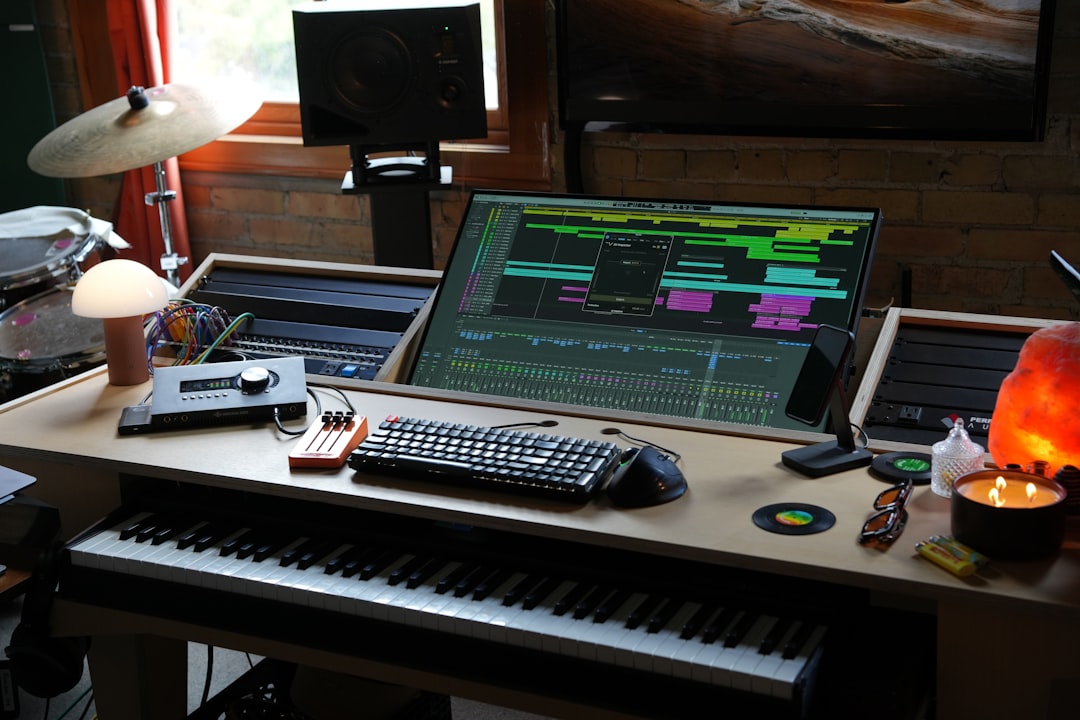
Learning how to chop samples is the fastest way to turn a two-second scrap of an old record into a beat that sounds like yours. At its core, chopping means slicing a longer piece of audio into small hits, then replaying those slices in a new order across a keyboard or drum pads. Get the slicing tight and everything downstream — drums, 808s, swing, arrangement — falls into place.
Violet Recording is reader-supported — we may earn a commission from links on this page, at no extra cost to you.
This guide walks through the whole process the way a working producer would explain it to a friend: pick a source, find the groove, cut it clean, sequence the drums around it, tune your 808, loosen the timing with swing, then build a full arrangement. You don’t need an expensive setup — any modern DAW and a pair of ears will do.
What you’ll need before you start
- A DAW with a sampler or slicer — FL Studio (Slicex/Fruity Slicer), Ableton Live (Simpler/Sampler), or a free option works fine. New to this? See our roundup of the best free DAWs for beginners.
- A source sound — a loop, a vocal, a one-shot, or a full song section you have the right to use.
- Drum sounds — kicks, snares, hats, and an 808. A good free drum VST covers this.
- A tempo in mind. If you’re matching an existing loop, use our free BPM finder and metronome tools to lock the tempo before you cut.
Steps at a glance
- Choose and prep your source audio.
- Find the tempo and set your grid.
- Chop the sample into usable slices.
- Re-sequence the slices into a new melody or groove.
- Program drums underneath.
- Tune and write an 808 line.
- Add swing so it breathes.
- Arrange the loop into a full song.
Step 1: Choose a source worth chopping
The best chops start with the best raw material. Look for a short passage with a strong emotional hook — a soulful vocal run, a jazzy chord stab, a dusty piano phrase. You only need a bar or two; producers have built classics from a three-second snippet. Two practical tips: pick something with clear transients (notes that start sharply are easier to slice), and avoid busy sections where a bassline and drums are already fighting your own drums. A clean, mostly-melodic passage gives you room to build.
If you’re sampling from your own records, clean them before you record. Every pop and click ends up in your slices. Our guide on how to clean vinyl records safely walks through the process without damaging the grooves.
When you need original loops and one-shots to chop — royalty-free stems, vocal phrases, instrument licks — pulling from a library like Splice is the standard move. It saves you crate-digging for hours and keeps you clear of clearance headaches.
Step 2: Find the tempo and set your grid
Before you cut anything, figure out the source’s tempo. Drop the audio into your DAW, loop one bar, and nudge the project BPM until the loop lines up perfectly with the metronome click. If you’re unsure, run it through a BPM finder first. Getting the tempo right matters because most slicers cut on the beat grid — a wrong tempo means your slices land off the beat and you’ll fight the timing all day. Once the loop is locked to the grid, enable snapping so your cuts fall cleanly on beats and sixteenth notes.
How to chop samples cleanly into slices
Now the main event. Load the audio into your slicer (FL’s Slicex, Ableton‘s Simpler in Slice mode, or the equivalent). You have two ways to place your cut points:
- Transient detection — the sampler auto-detects where each note starts and drops a marker there. Fast, and great for rhythmic material, but check every marker: it often misses soft notes or adds false ones. Delete the junk, add the ones it missed.
- Grid slicing — the sampler cuts at fixed intervals (every beat, every sixteenth). Predictable and musical when your loop is quantized, but it’ll cut through the middle of notes if the timing is loose.
For most melodic samples, start with transient detection and clean it up by hand. The goal is one slice per musical event — a chord, a word, a drum hit. Zoom in and make sure each slice starts right at the attack with no dead air in front (that gap causes sloppy timing later) and ends before the next note begins. A quick fade-in and fade-out of a few milliseconds on each slice stops the clicks and pops you get from cutting across a waveform mid-cycle. Clean edges here are the difference between a chop that sounds intentional and one that sounds broken.
Step 4: Re-sequence the slices into something new
Once the slices are mapped across your keys or pads, forget the original order. This is where chopping becomes composing. Play the slices back in a new sequence — reverse a phrase, repeat a single chord in a rhythmic stutter, pitch a slice up an octave for a hook, or stitch two unrelated slices into a melody that never existed in the source. Record your performance in, then quantize lightly if it’s messy. The trick is restraint: a four-note reordering that loops hypnotically often beats a frantic 20-slice scramble. Find the two or three slices that hit hardest and build the loop around them.
Step 5: Program drums that lock to the chop
A chop without drums is a sketch. Build the backbone first:
- Kick — anchor beat 1, then place a second kick wherever the groove asks for it (often just before or after beat 3 in hip-hop and trap).
- Snare or clap — on beats 2 and 4. This is the backbeat that makes heads nod; keep it steady.
- Hi-hats — start with steady eighth or sixteenth notes, then vary the velocity so some hits are ghost-soft and others pop. In trap, add fast hat rolls (triplets, thirty-second runs) for movement.
Layer a soft second kick or a sub-thump under your main kick if it feels thin, and carve a little low-end out of the sample so the kick has room. If you want to hear ideas fast, our free browser drum machine and metronome let you audition patterns before you commit them in the DAW.
Step 6: Tune and write your 808
The 808 is a tuned kick-bass that carries the harmony, so it can’t just sit on one note. Find the key of your chopped sample — hum the root, or check it against a keyboard — and tune your 808 to that root note. From there, move the 808 to follow the chords in your loop: if the sample shifts to a new chord, glide or retrigger the 808 to the new root. Use portamento (glide) between notes for that sliding, connected 808 sound, or retrigger cleanly for a punchier, staccato feel. Keep the 808 pattern simple and pocketed with the kick — long sustained notes in the gaps, short stabs where the kick hits. If the 808 and kick clash, sidechain the 808 to duck slightly every time the kick lands so both stay audible.
Step 7: Add swing so the beat breathes
Perfectly quantized beats sound stiff. Swing (or shuffle) delays every other subdivision by a small amount, pushing offbeat hats and notes late so the groove feels human and laid-back. Most DAWs have a global swing knob or a groove template — start around 10–20% and listen. A little goes a long way. Apply it to hats and the chopped melody especially; the drums locking hard while the hats swing loose is a big part of why soulful and boom-bap beats feel so good. You can also nudge individual hits off the grid by hand for a looser, sampled-from-vinyl feel.
Step 8: Arrange the loop into a full song
An eight-bar loop is a beat; a song needs an arc. Give it structure: an intro (chop alone, or drums alone), a verse (full groove, maybe drop the 808 for a bar), a hook or chorus (add a layer — a vocal chop, an extra melody, a fuller drum fill), and a bridge or breakdown that strips elements away before the final section slams back in. Use small variations to keep it interesting — mute the hats for two bars, drop the sample out under the hook, add a riser into a section. Standard structures run intro / verse / chorus / verse / chorus / bridge / chorus, but bend it to your track. The point is contrast: sections should feel different from each other so the listener stays engaged for three minutes, not eight bars.
Turning a chopped beat into a finished track
Sometimes you’ve got a killer chop but no time (or no vocalist) to build the full song around it. If you want to hear where an idea could go — a full arrangement, vocals, the works — you can feed the concept into Solmi and get an original AI-generated track back to react to. It’s a fast way to test whether a hook has legs before you invest a whole session in it.
When your beat is done, the last mile is the mix. Balancing the sample against your drums, taming the 808, and getting the whole thing loud enough is its own craft — our beginner’s guide to mixing your first song and the Sound Design hub pick up right where this leaves off. And if you’re planning to release, learn how to start selling beats once the track is mastered.
Frequently asked questions
Do I need expensive gear to chop samples?
No. Any modern DAW with a built-in sampler will chop, sequence, and arrange samples with no extra hardware. A MIDI keyboard or pad controller makes re-sequencing more fun and expressive, but you can do everything with a mouse and your computer keyboard. Start with what you have and upgrade only when a specific limitation is slowing you down.
Is it legal to chop samples from records?
Chopping an uncleared commercial recording and releasing it can be copyright infringement — even a short slice. For anything you plan to publish or sell, use royalty-free loops and one-shots from a licensed library, record your own sounds, or clear the sample properly. Practicing with copyrighted material privately is one thing; distributing it is another, so keep the two separate.
How long should a sample be before I chop it?
Shorter than you’d think. One or two bars of a strong melodic phrase gives you plenty to work with — often the best beats come from a single chord stab or a two-second vocal snippet repeated and reordered. Long samples tempt you into leaving them untouched, which defeats the purpose. Grab a small, characterful piece and make it your own.



